If you’re not ready to hire out your Pinterest yet, that’s okay! Let me show you how to optimize your own account to get the traffic to your site that you need.
You’ve learned some Pinterest basics. You even understand why it’s important for your business, but is your Pinterest account optimized to give you the traffic you want?
If you’re creating pins, creating all the content you can crank out and still not getting the traffic to your blog posts, it could be because your Pinterest board is a mess.
When you hire me to manage your Pinterest, I usually spend the first month cleaning and optimizing your boards (if you haven’t done so already), but if you’re looking to have your hands dirty so you can maybe get more familiar with Pinterest for business, here are some best practices to optimize your Pinterest account.
How To Optimize Your Pinterest Account
1. Use a real photo
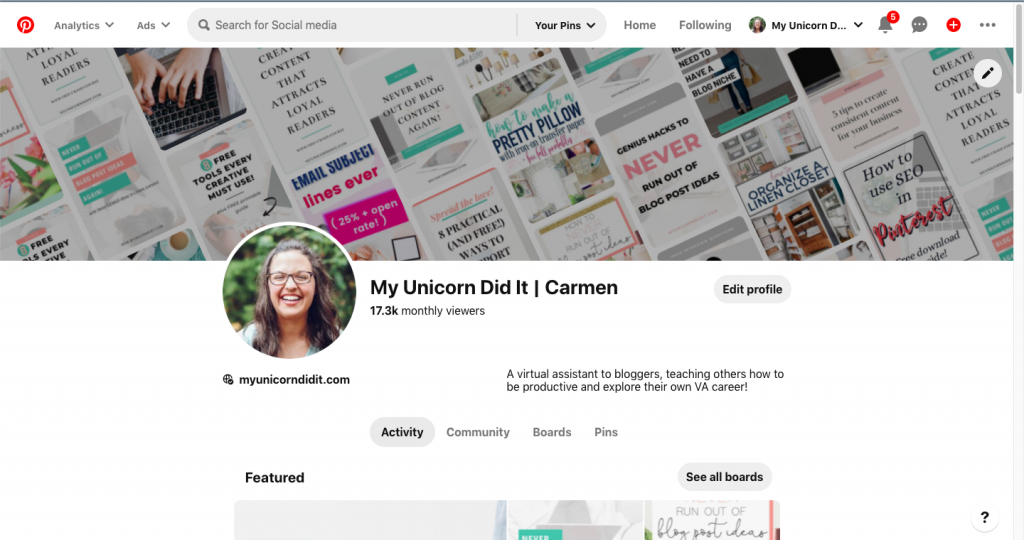
People like to see your face. I know a lot of people will tell you to have a logo there and while I’ll definitely agree there isn’t anything wrong with it, having a photo feels more personable.
People want to be connected to you, they want to know you’re out there to help them and they can see that in your smiling face.
What’s the saying? A picture is worth 1000 words? This might just be the way your ideal client finds you and you want them to feel a connection with you, not your logo.
2. Make your bio your elevator pitch
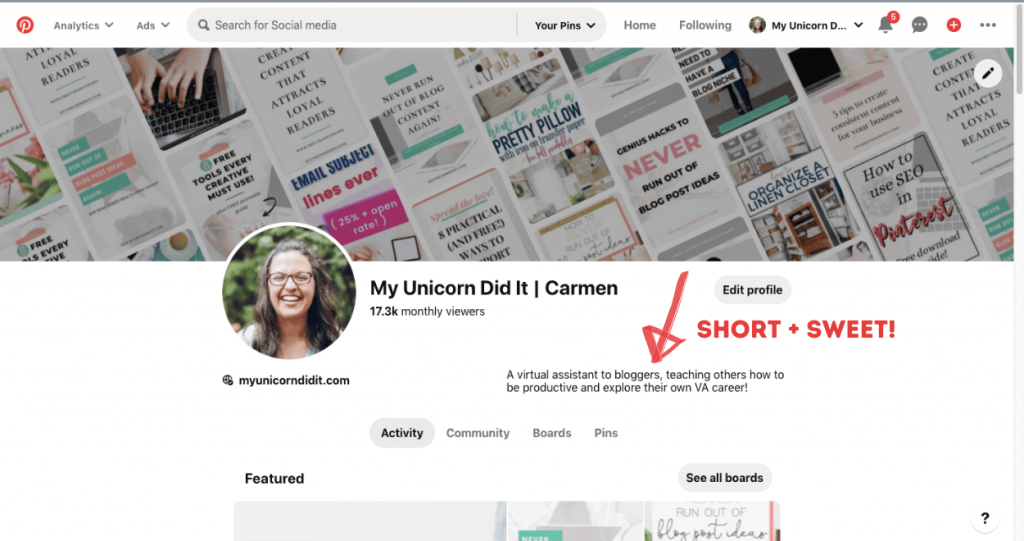
Get in and get out in your bio. You only have very few characters so you need to make it count.
Pro tip: DO NOT add a call to action or a Bit.ly link in your profile. It doesn’t link itself which means someone would have to physically copy/paste that link and nobody is going to do that. I can promise you.
Tell people what you’re about and most importantly, this is a great chance to get in some relevant keywords so that if Pinterest users search for those keywords, your profile could even come up in search results under profiles. Free content marketing for you!
3. Use drag and drop organization
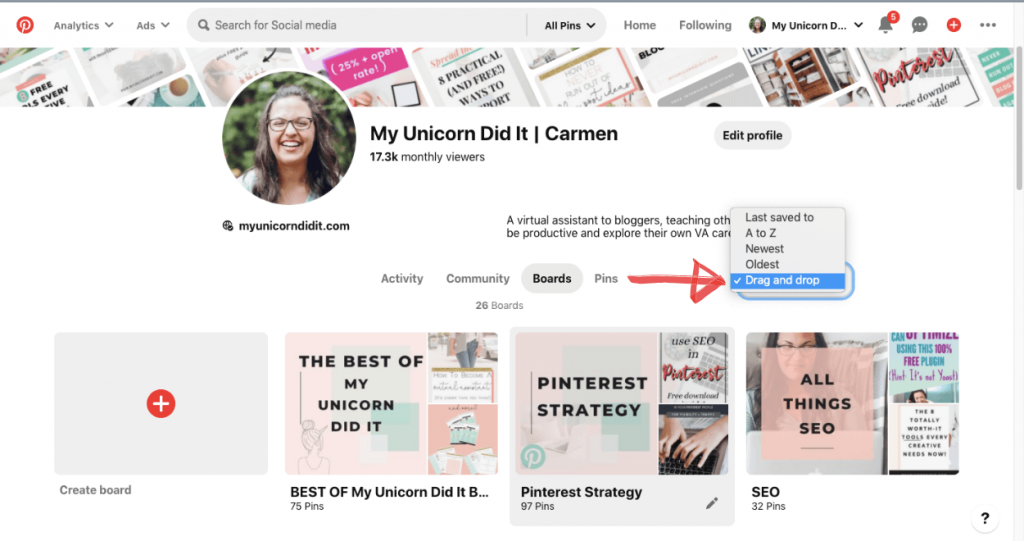
When you’re editing and creating your boards, you have the option to sort by A to Z, drag and drop organization or last pinned to.
I like to choose the drag and drop editor because I feel like you have more control over what board is seen first. I typically change these up once a quarter, especially on my home decor account because if you’re in a niche that has seasonal content, you can have those boards first.
I also like to have my group boards closer to the bottom. I don’t join them much anymore because I much prefer Tailwind Tribes, but I stay in them if they perform well for me.
4. Create very specific boards
Let’s say that you are a food blogger and your specialty is teaching your audience how to cook in a short window of time.
Instead of creating a board called “30 Minute Meals”, split that into 3 boards:
- 30 Minute Breakfast Ideas
- 30 Minute Lunches On The Go
- 30 Minute Dinners For The Busy Family
Now instead of 1 board description, you have 3 board descriptions which means 3x the possibility of someone finding your pins based on your pin descriptions.
The more Pinterest sees that your content is more valuable, the more likely it will be shown to more people in the Pinterest smart feed.
Bonus tip: The boards you don’t have on your account are just as important as the ones you do. It’s okay to have boards that are not related to your niche, but make them private so that your users won’t see them.
If a Pinterest user finds you because you’re pinning dope business content, don’t try to shake things up and start pinning a bunch of new recipes because you’re jumping on the Whole30 train. They won’t care about that and are likely to bounce. We don’t want that.
5. Pin to most relevant board first
Make sure that regardless of whether you’re doing manual pinning or using a scheduler like Tailwind, make sure that you are pinning to your most relevant board first.
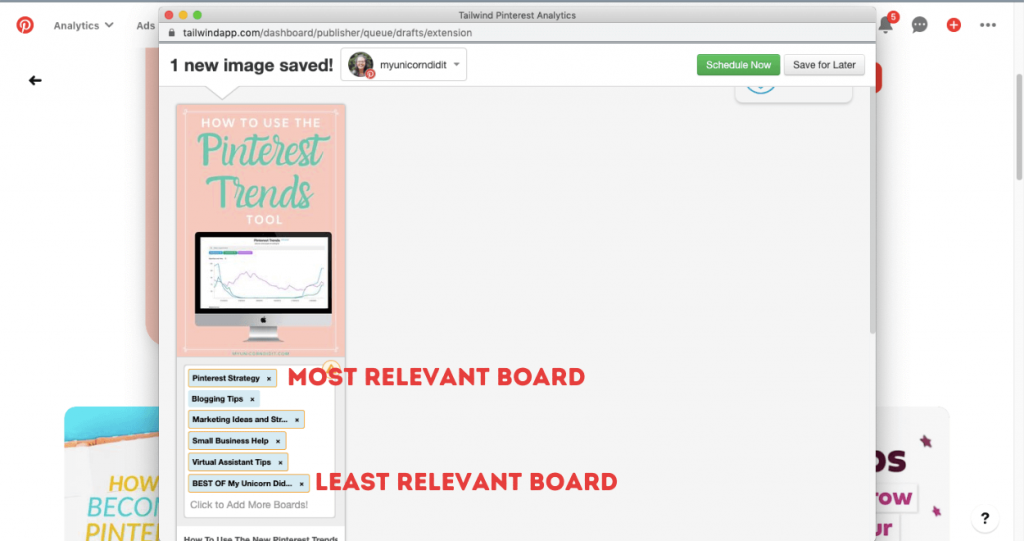
Pin in order from most to least relevant.
This means if you have a board with all of your content, that should always be last on your list when you’re pinning.
However, I should also point out that you should never pin a board to something that’s totally off topic.
Don’t be pinning recipes to your “Small Business Tips” board. It doesn’t make sense.
6. Be very descriptive
Use keywords everywhere. Do keyword research. I can’t stress this enough. Pinterest SEO is a thing and it can make or break you.
Having a good title and description on your pins is what helps people find you. You can get real good traffic for free if you play your (Pinterest marketing) cards right.
7. Keep an eye on your analytics
While I’m fond of Pinterest analytics, you need to make sure that you focus on the right metrics.
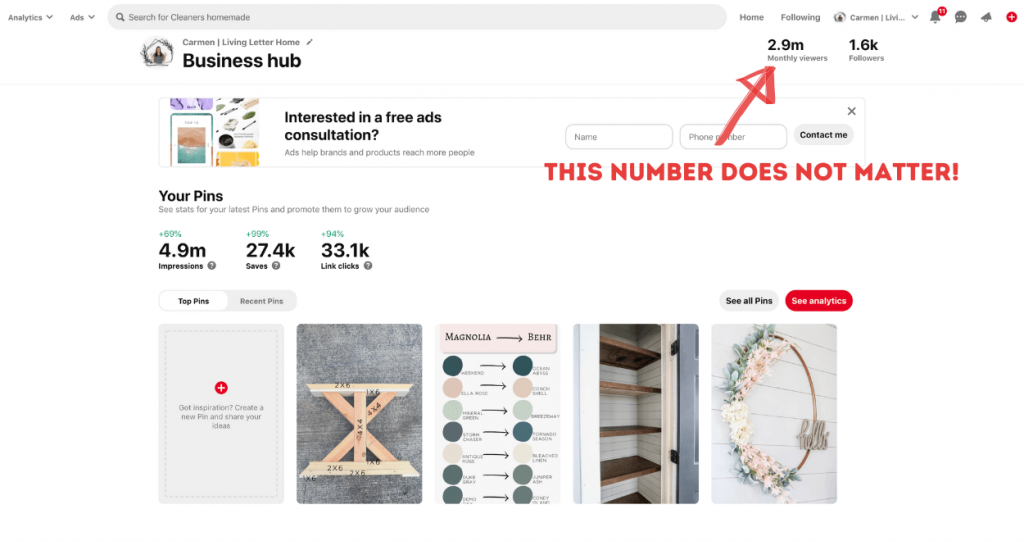
You want the clicks.
We don’t care about impressions or saves. We are looking at clicks.
This is actually why I like to use my Google analytics because I really like to be able to dive deep into what pins people like and what takes them to my site.
Once a week, I have a reminder set in my phone to check out (and repin) my top 10 pins.
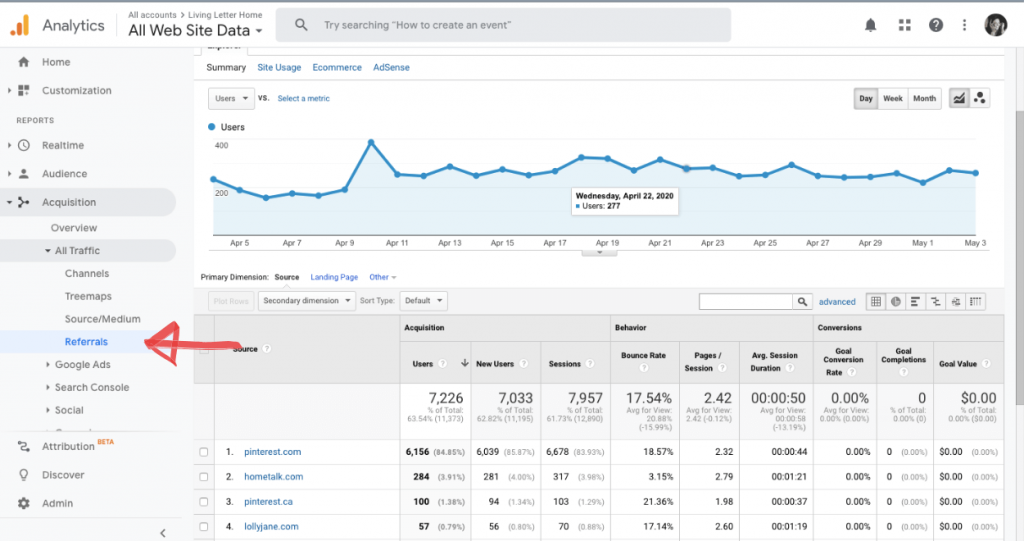
To find your top pins in your Google Analytics, go to Google Analytics > Acquisition > All Traffic > Referrals.
Once you’re here, you can see that Pinterest is at the top for referrals for me. Click on Pinterest.
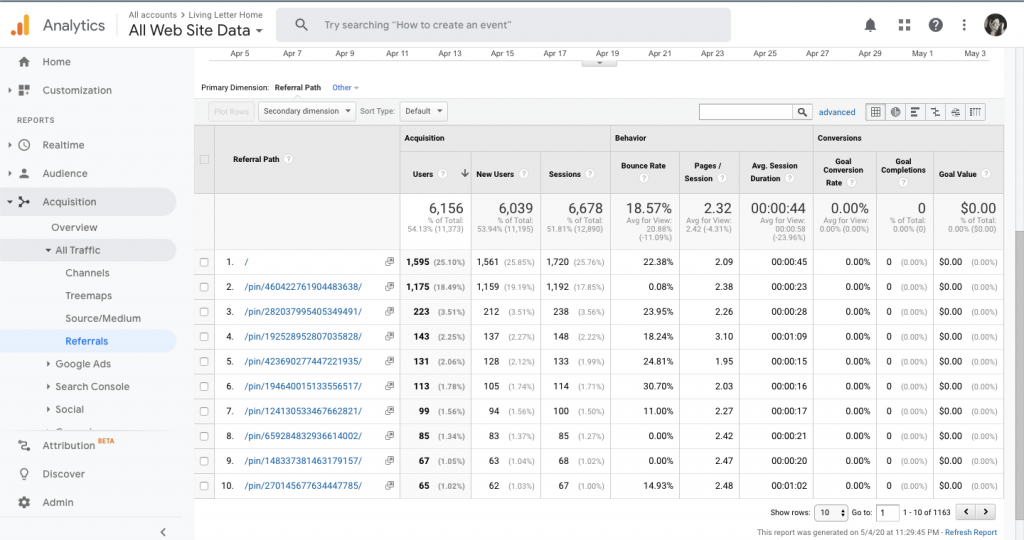
Bam. This right here. If you click the arrow beside the URL slug, you’ll be taken to the exact pin on Pinterest that is bringing you the traffic.
I aim to repin these weekly so that I’m just saving again what people are already liking on my site. No need to reinvent the wheel.
You could also share these pins on other social media channels if your audience is there – Facebook or Instagram.
8. Add pinnable image to every post
It is very, very rare that I don’t add a Pinterest image to a post.
I like Photoshop personally because you can have a lot more freedom in your control of things like text placement, spacing and design, but Canva is my favorite for user-friendly and quick pin design!
You can use a plugin like JQuery Pin It Button to make it easy for anyone to pin any image on your site.
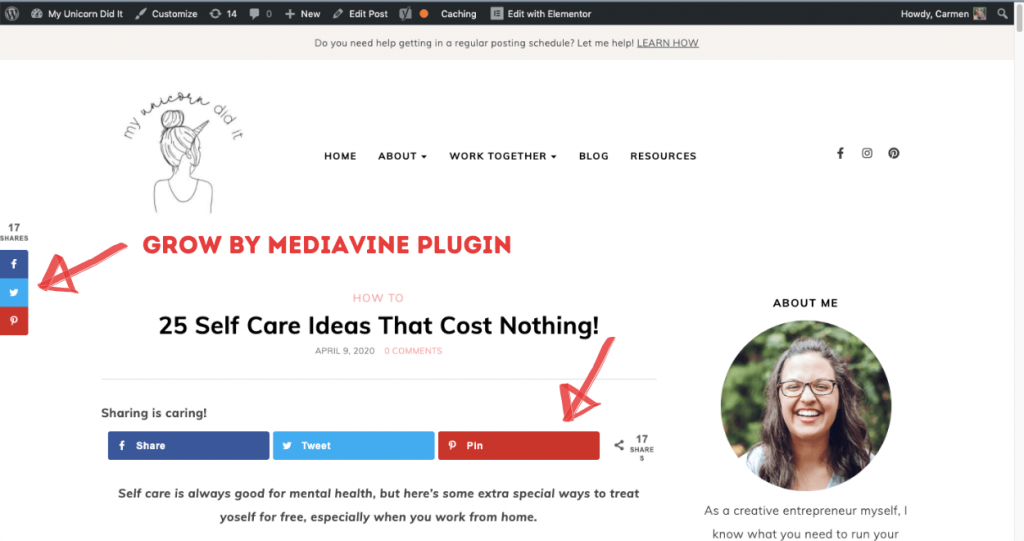
I also pay for a plugin called Grow by Mediavine that allows me to hide multiple images within my post.
Sometimes I add the pins throughout like this post about free self care ideas that I did here.
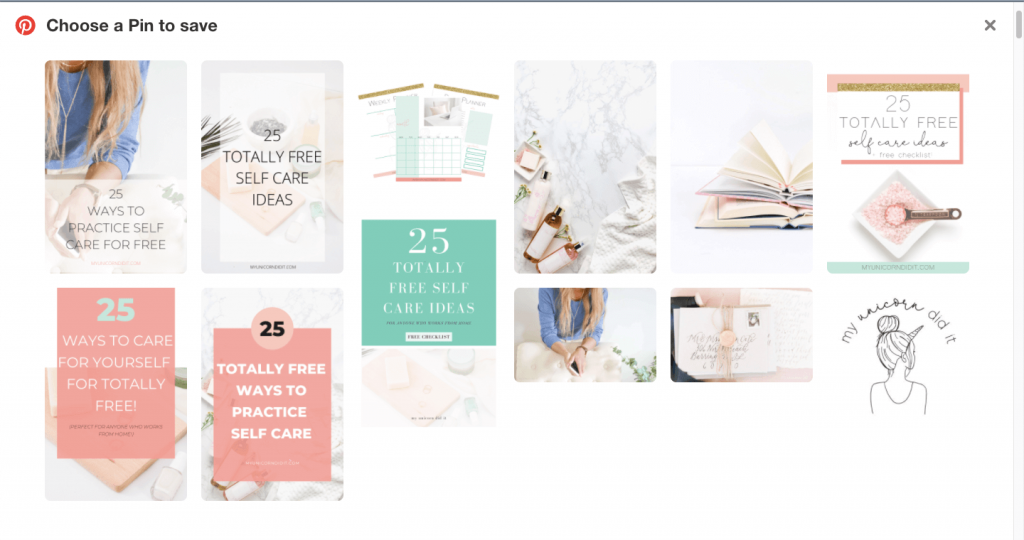
But if you click on the “Pin it” button on the sidebar at the top, you can actually see I have several more pins hidden on the post itself.
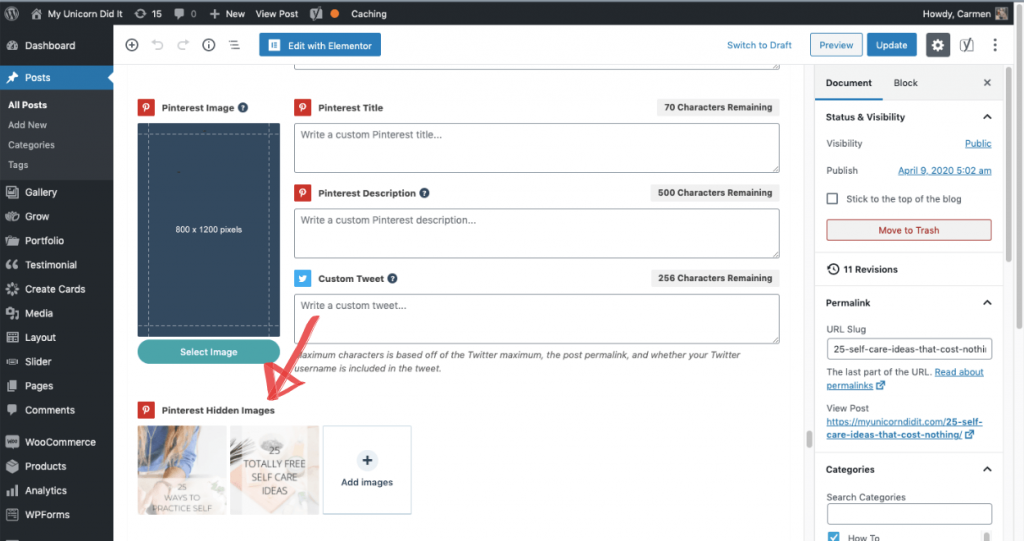
Here’s what it looks like when you’re composing your post to hide your images. (Psst! There are hidden images on this post too! You should try to find them and pin them 😉)

You’ll also notice that I have a little “call to action” bar that I always add before my pins. This is super strategic.
I do this so that it both signifies the end of my post and creates urge in one’s head of, “Yeah, I definitely want to pin this post so that I can remember to come back to it later.”
I know this may seem like a lot of information, but hopefully if you’re not quite ready to hire out your Pinterest to me or someone else, this can help you get on the right track.
If you think you might be ready to hire that out, I’d love to have a chat with you so feel free to contact me!



I was actually only using Pinterest on my phone and never looked at on the computer so I didn’t see the analytics lol. I’m a total blonde now 😃. Glad I read your post and saw there was more than what I was seeing. I even changed my photo like you said to.
Yay!! Good luck 🙂